Generate a PDF using PowerAutomate Method – 1
R
ecently while working for one of the client’s requirements, in which they wanted to generate a PDF saved in SharePoint Document Library once the user submits a Form. The PDF had to be in a pre-defined format that they were using as Word Document.
This was achieved with 2 different approaches –
Generate a PDF of SharePoint List Data Through HTML Template from Microsoft Flow
In this approach we created a html of the document and upload as a Template, used the template in Flow to create html file in OneDrive and then converted the file to PDF and saving it in SharePoint Document Library.
Generate a PDF of SharePoint List Data with Word Template from Microsoft Flow
In this approach we used the predefined format as Template in SharePoint Document Library, then updated the file properties and created a template in OneDrive then converting that template to PDF and saving in SharePoint Document Library.
Part-1
Generate a PDF of SharePoint List Data Through HTML Template from Microsoft Flow
Step-1
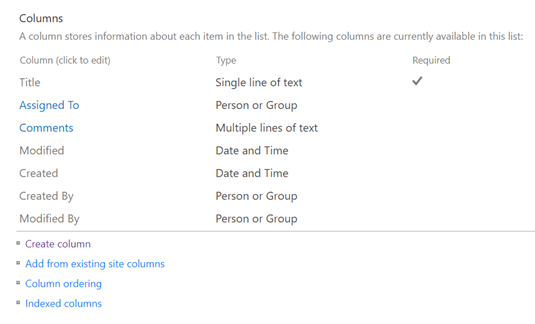
Create a SharePoint Custom List named Conversion-to-PDF-from-Flow with necessary fields to enter the data, required to move to predefined PDF Format. Here I have taken following fields.
Create another SharePoint Document Library with name Test-PDF-Documents to store the generated PDF’s.
Please note, while creating multi-line columns, make sure the plain text is selected.
Step-2
The HTML Template
Create a html format of the data you want, here is the format I used, the structure used here contains {tokens} that would be used in Flow compose actions to perform text replacements.
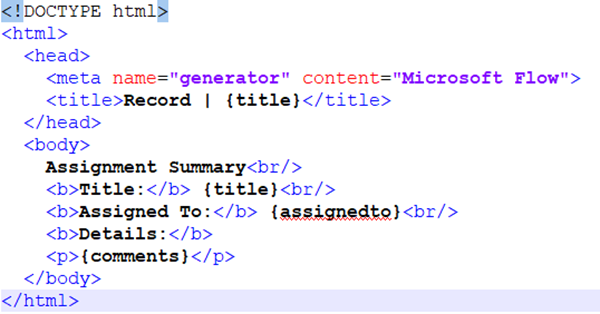
This is a simple document, for creating more styled document, you can add CSS as per the requirements.
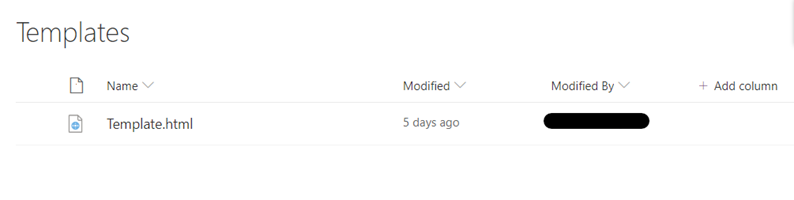
Create a SharePoint Document Library named Templates to store the template in html format.
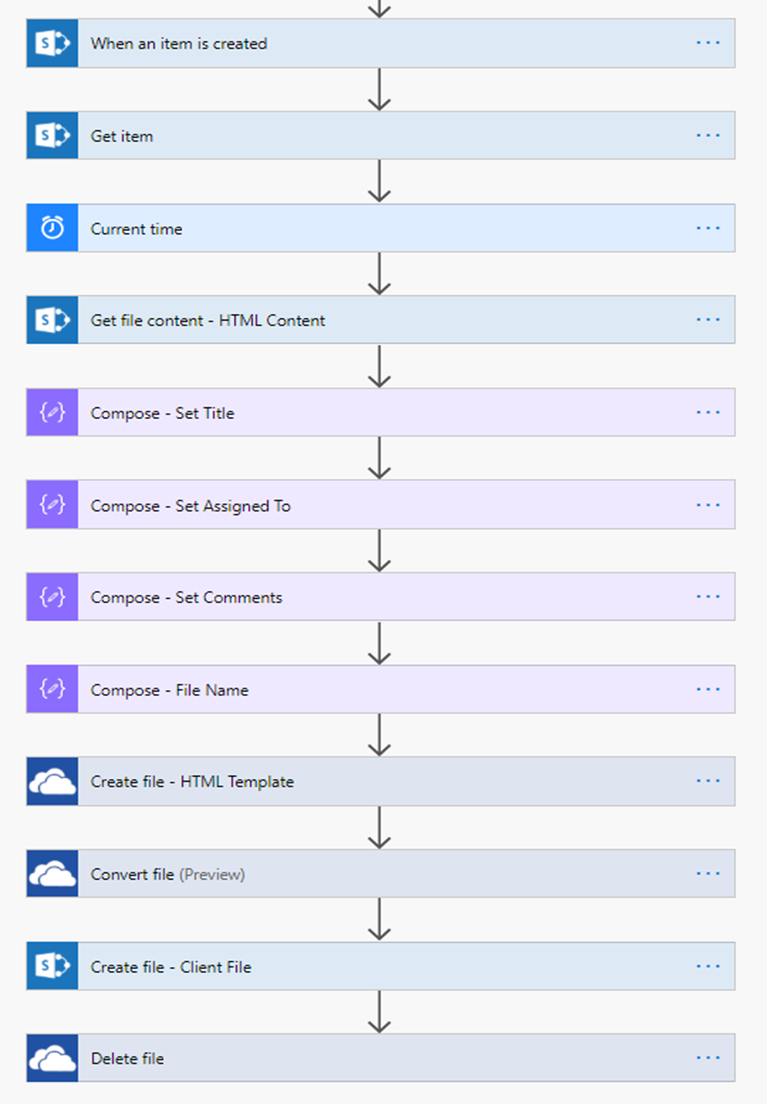
Step-3
Creating the Flow
- Create the flow with the trigger, when an item is created of SharePoint connector. Select the site collection address and List’s name.
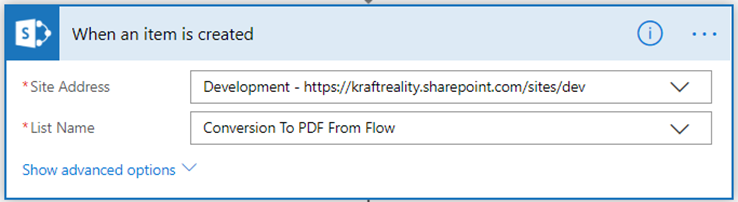
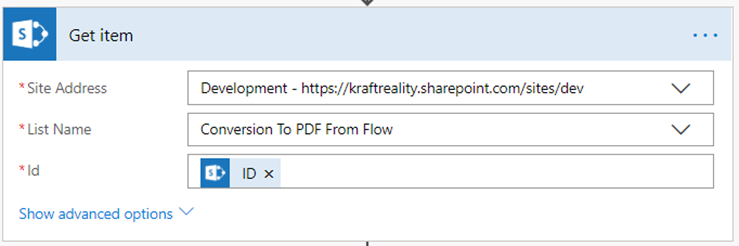
- Click on + sign or next step, add Get Item action of SharePoint connector. Select the Site Collection address and List’s name and select ID parameter from Dynamic content window from When an item is created section.
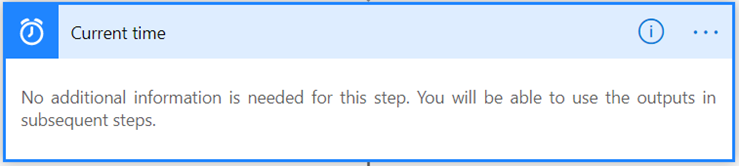
- Add an action, Current time of Date Time connector. We would use the same in compose action while creating the file name.
- Add an action, Get File content of SharePoint connector. Select the Site collection address and the File Template, in this case I created a Library named Templates, and Template is the name of the template, we would be using.
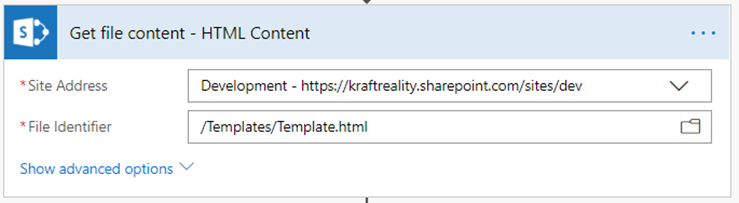
- Add an action, Get File content of SharePoint connector. Select the Site collection address and the File Template, in this case I created a Library named Templates, and Template is the name of the template, we would be using

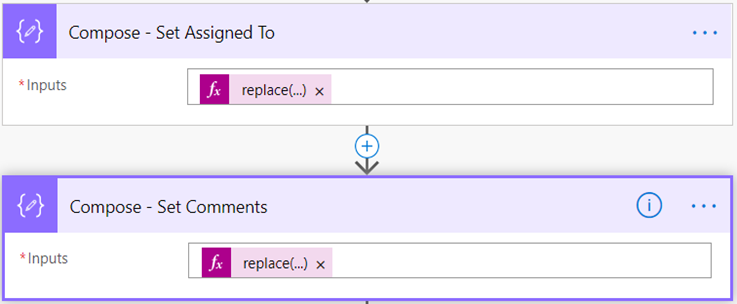
- Similarly, we would add 2 compose actions to replace Assigned to and Comments section with the following expression respectively.
@{replace(outputs('Compose_-_Set_Title'),'{assignedto}',body('Get_item')?['AssignedTo']?['DisplayName'])}

@{replace(outputs('Compose_-_Set_Assigned_To'),'{comments}', body('Get_item')?['Comments'])}
- Add another Compose action to set the file name. We can set the name as we want, here I have taken Name from the SharePoint list and Current time to differentiate the files.

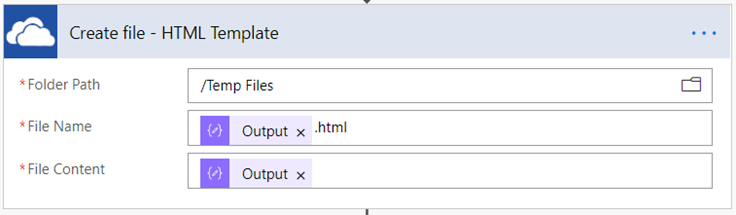
- Add an action, Create File of OneDrive for business connector. Select the Folder path, set the file name from the output of the File Name and add .html at its end, select the File Content from the output of action Compose- Set Comments.
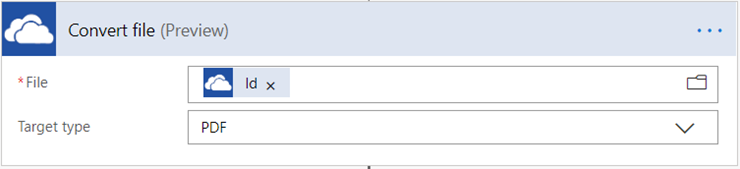
- Add an action, Convert File of OneDrive connector. Select the ID from the previous action of Create File.
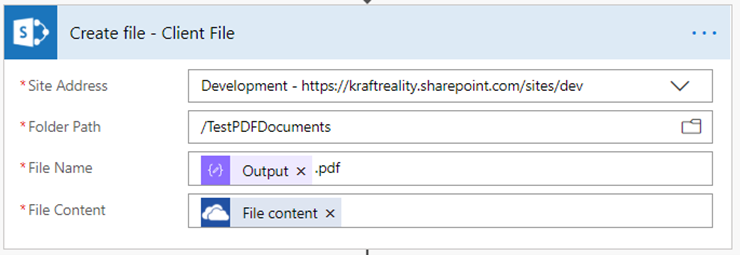
- Add an action Create File of SharePoint connector. Select the Site collection address, select the Folder path as the Library where you would like to store the file, set the File Name as the output of action Compose- File Name and add .pdf at its end, set the File Content as the File Content from Dynamic Content of previous action Convert File
- Add an action to Delete the File created in OneDrive folder, Add Delete File of OneDrive for business connector. Select the ID as the ID that was used to create file from previous Create File action. Save the Flow.

The final look of flow would be like this,
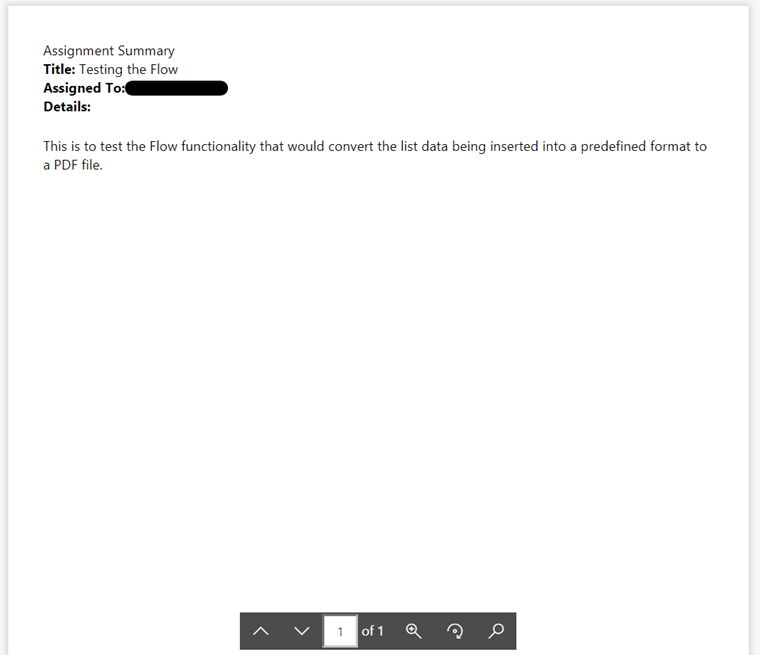
Let’s enter data in our SharePoint Custom List Conversion to PDF from Flow,
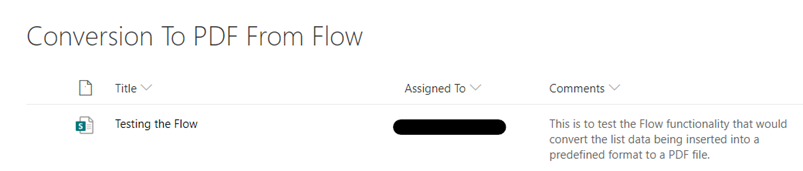
The document that would be created inside the Library after the Flow runs would come up as,

The file content will come up like this,