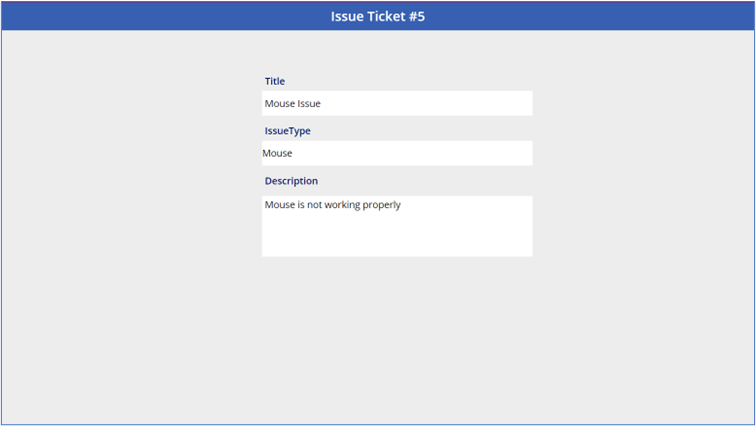
A Deep link is one type of hyperlink that send an app user to a specific record or screen. When a new record is added to a SharePoint list, a hyperlink will be sent for the submitted record through email.
In this blog post, I have shown the steps for how to send an email with deep links that immediately open Power Apps to a specific record or screen.
Now let’s start building the solution for deep links email direct link to specific record.
Introduction: Create an Issue Tracker App
We will create one PowerApp for generate issue tracker through app and request send to help desk. After sending request help desk will resolve issue for requested user.
Setup The SharePoint List
First create SharePoint list for requested user request with the following columns:
| Column Name | Column Type |
| Title | Single line of text |
| IssueType | Choice [Options: LAN, Mouse, Internet, Printer, Desktop, Laptop] |
| Description | Multiple line of text |
Add necessary columns in created SharePoint list below shown in image.
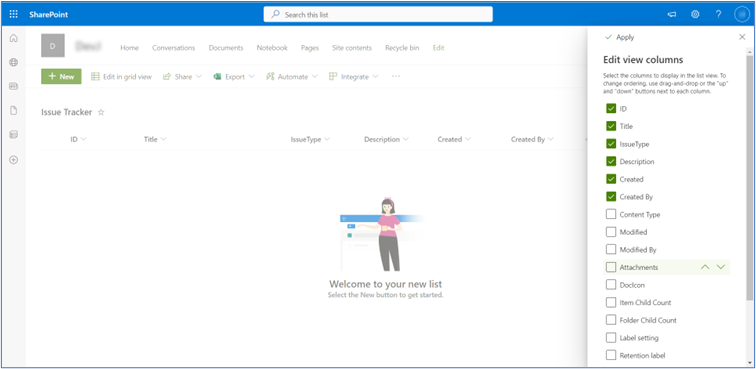
Edit form in PowerApps
Let’s create one canvas app for create issue tracker for new user.
Add one label and connect data source then add SharePoint list (which created in SharePoint site)
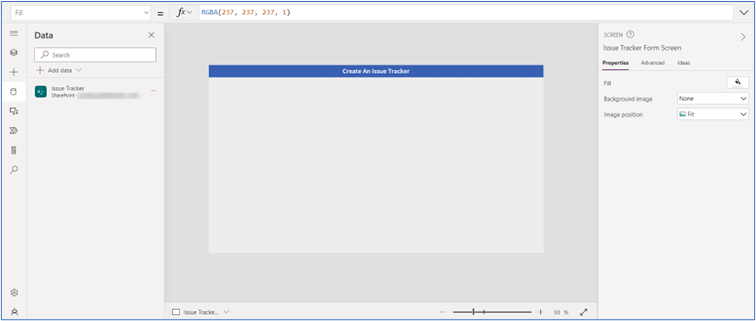
After adding data source take one “Edit Form” and connect SharePoint list as data source.
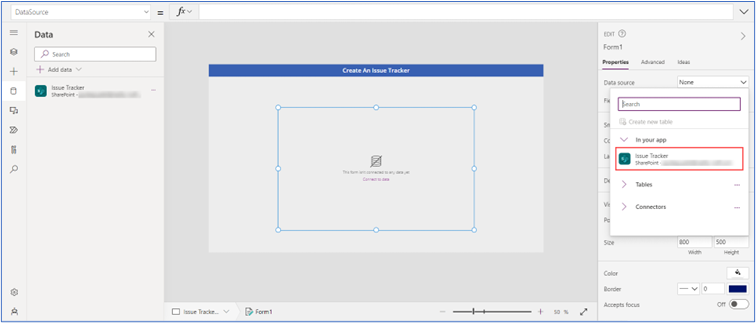
Add Title, Issue Type and Description fields in the form and delete unnecessary fields.

Change the DefaultMode as “new” because, when we will submit form then new record will added to the SharePoint list.
“FormMode.New”Submit Button For The Edit Form
Now, insert a new button below the form with the text “Submit”.
Add this code in the OnSelect property of the form to submit the form details to the SharePoint list.
“SubmitForm(Issue_Tracker_Form)”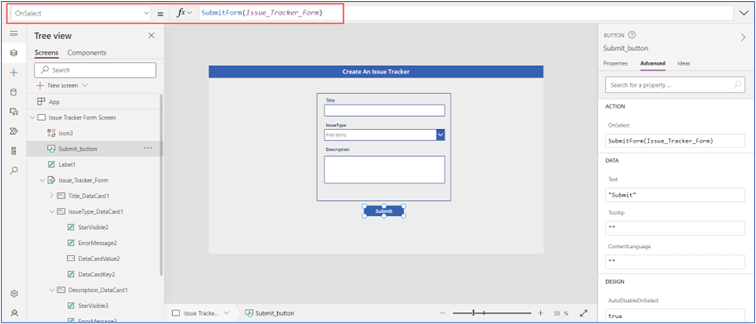
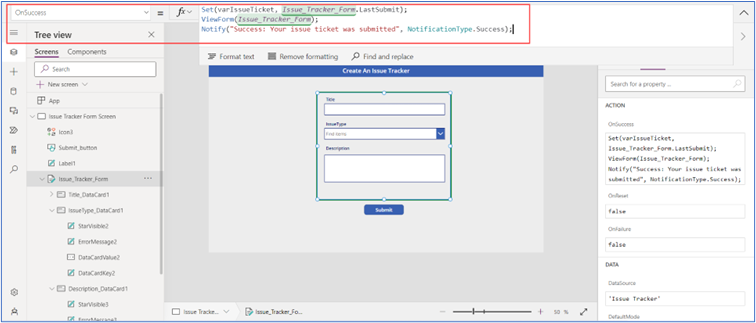
Then add this code to the OnSuccess property of the form to define what happens after the new ticket is successfully created. We want to capture the ticket details in a variable called varIssueTicket, change the form to view-mode and then show a banner at the top of the screen to let the user know their ticket was saved.
“Set(varIssueTicket, Issue_Tracker_Form.LastSubmit);
ViewForm(Issue_Tracker_Form);
Notify("Success: Your issue ticket was submitted", NotificationType.Success);”
Put variable name on Item property of form
“varIssueTicket”Use this code on Visible property of the submit button to hide it after the ticket is submitted.
“Issue_Tracker_Form.Mode<>FormMode.View”
Get the PowerApps URL
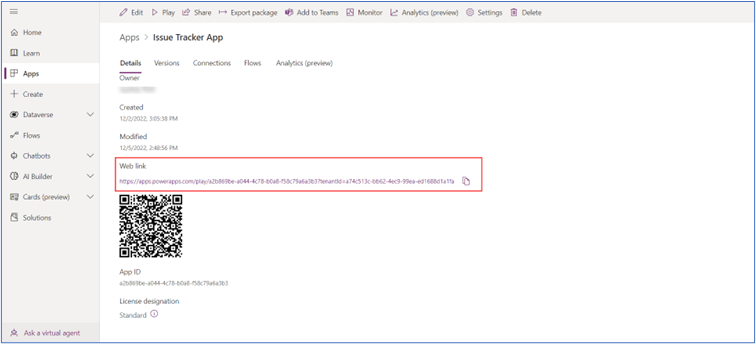
Now generate link to the submitted ticket we must first obtain the app’s web link.
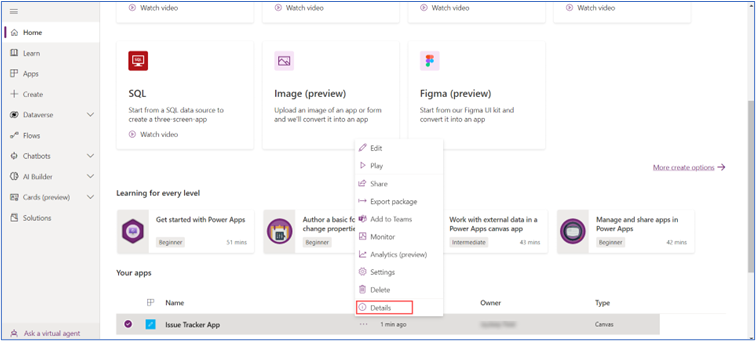
Copy “Web link” into notepad. We will need it in Power Automate flow action.
Send Deep Link in Email using Power Automate
After submitting user request through powerapp help desk will receive an email with direct link.
Go to the Power Automate and build one cloud flow will send email to helpdesk for submitted request. Choose “When an item is created” for the trigger.
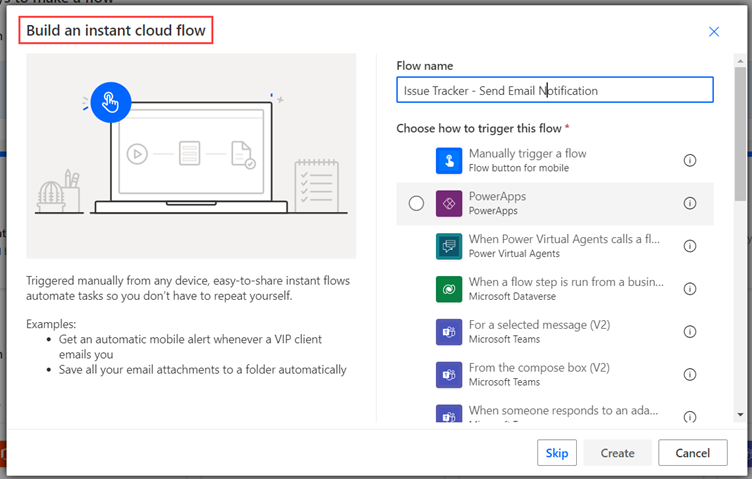
Add two actions in the flow: “Compose” and “Send An email V2(Outlook)”.
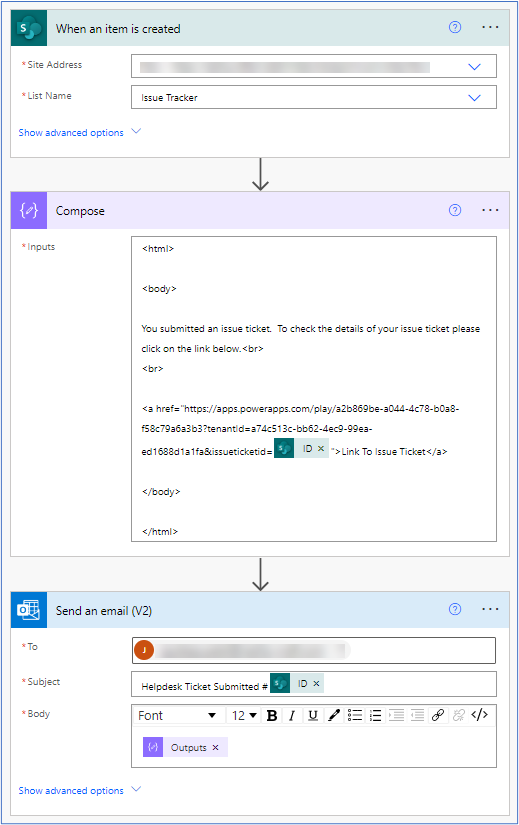
In the compose step of the flow we are writing HTML code to insert into the body of the notification email. We take the web link for the app and add a URL parameter called issueticketid. This parameter is filled with the unique ID number from the SharePoint list.
“<html>
<body>
You submitted an issue ticket.  To check the details of your issue ticket please click on the link below.<br>
<br>
<a href="https://apps.powerapps.com/play/a2b869be-a044-4c78-b0a8-f58c79a6a3b3?tenantId=a74c513c-bb62-4ec9-99ea-ed1688d1a1fa&issueticketid=@{triggerOutputs()?['body/ID']}">Link To Issue Ticket</a>
</body>
</html>”
After add html code in compose action then add send email action put output in body section then save the flow.
Get Item ID in App OnStart Property
When the app opens it must check whether a record ID was supplied inside the issueticketid URL parameter. If issueticketid has a value, the form should display that record, otherwise, it will appear blank.
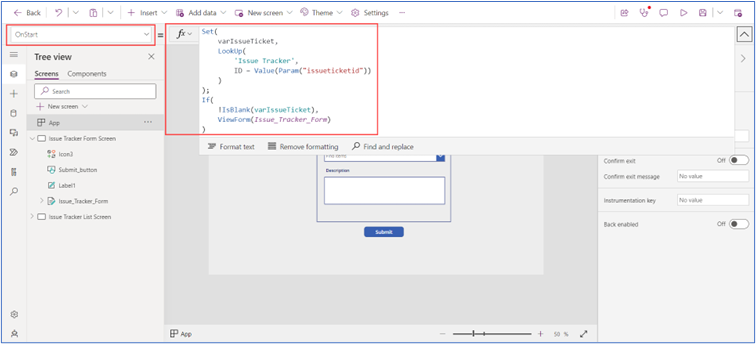
Use this code in the OnStart property of the app. It performs a lookup on the issueticketid URL parameter and stores the result in the varIssueTicket variable. If a record was found it changes the form to view mode (instead of new mode which is the default we setup earlier).
“Set(varIssueTicket,LookUp('Issue Tracker',ID = Value(Param("issueticketid"))));
If(!IsBlank(varIssueTicket),
ViewForm(Issue_Tracker_Form))”
When the form is in new mode the titlebar will show the text “Create An Issue Tracker”, otherwise, it will display the ticket ID number. Use this code in the Text property of the titlebar.
“If(Issue_Tracker_Form.Mode=FormMode.New,"Create An Issue Tracker","Issue Ticket #"&varIssueTicket.ID)”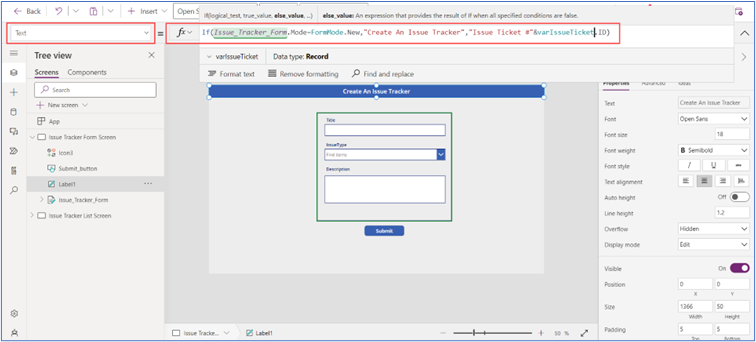
Submit Form To Send An Email
Now test the app first fill the form which is created in powerapps, after submitting form email sent though direct link to the submitted record.
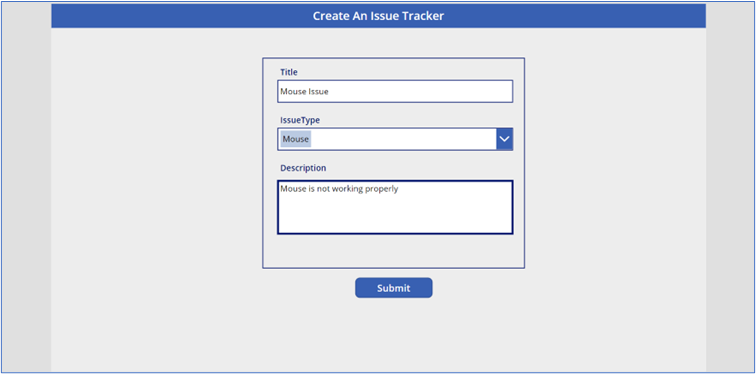
After submitting form waiting for few moments and an email will appear with direct link to issue ticket record.
Click on the link mention in email.

When we click on the link app open with the form in view-mode and display the issue ticket details.
